Pages

Create ~ Inspire ~ Share

Friday, September 30, 2011

Monster Mash Candle Project!

Hi Everyone!
I am so excited about the project I have for you today!! I was trying to figure out what kind of halloween decoration would look good on a shelf that was looking kind of bare. I started looking and saw this old candle holder with these red candles on it that I keep in another spot in my house. A lightbulb went off and I got to work!
Here is the candles before:
Here is the after picture!
For the mummy, I first put some googly eyes on a black sheet of paper and adhered it with tape to my candle. I then cut strips of white paper and inked them. They were just layered with tape however I thought it looked good. I cut the spider from my potpourri cartridg and the mummy was done.
For Frankenstein, I cut the green paper to fit, inked it and added the black hair (cut by hand). For the face, I cut to white circle at .75 and two black circles at .50. For the eyelids and nose, I cut two more circles in green at .75 and cut them in half. I used pop dots to rais them up off of the eye balls. The mouth and stitches were hand drawn with a black marker. Isn't he cute!?
For the pumpkin, everything is hand cut because I didn't want him to look perfect. I just cut the orange paper to fit the candle and inked it a little. I inked the eyes, nose and mouth and used the leaves I cut to make the hair.
I absolutely love how it turned out and it looks great on my shelf!! I post a lot of projects on my facebook site, Creatively Crafty! If you like my page, you will be able to see when I add a new blog post and I have occasional contests!!
Have a Spooktacular Day,
Rebekah

Monday, September 26, 2011

BOO!!

Hi Everyone!
Today I have a fun home decor idea made using my Bind it All and Cricut! I cut heavy duty chipboard and rounded the edges. Then I used Modge Podge to adhere my paper to the chipboard. The letters are from the "Cuttin Up" cricut cartridge which I inked with black ink, then I cut the spider and witches hat from the "Mini Monsters" cartridge. The embellishments were in the dollar craft section at walmart!!! I used my bind it all to hook it all together. I can't wait to put this up on my shelf for Halloween!!


Thanks for looking!
Rebekah

Wednesday, September 7, 2011

Fall Themed Paper Wreath

Hi Everyone,
In my last post, I promised that I was going to make a Fall themed wreath this week and post it for you. Well, here it is!! I just finished it today. I just love all the different colors that can be used to celebrate Fall. I am happy with how it turned out and have it up in my front room already :-)


If you missed my Halloween themed wreath, check it out in the post below!!
Have a great day!
Rebekah

Friday, September 2, 2011

Halloween Paper Wreath

Hi Everyone!
I have a really fun project for you today! I know it's not October yet but I loved making Halloween crafts so I started a little early. The other day there was a tutorial at www.pinkcricut.com on how to make these paper wreaths. I had to try it right away!
The entire thing is made from paper and embellishments. The pumpkin is from the "Potpourri Basket Cartridge" and all the rest of the cuts are from "Mini Monsters".
I used a hot glue gun to put it all together!
If anyone is interested in buying one from me, I am selling them for $15 each. I am also going to make a Fall themed wreath his next week and will post that also!!


Have a wonderful Day!

Friday, August 26, 2011

Fun Gift Holder


Hi Everyone!
Today I have a super fun craft to share with you. The other day, Pink Cricut had a guest designer that made an adorable gift holder. I loved it so much I followed her link to You Tube to see how to make one! I have to say that I am completely hooked!!!
All you need is a 12x12 sheet of paper and some ribbon to make these! I made one for a baby boy gift and the other is for my friends birthday which is today!
I think these are perfect to hold small gifts like lotions, candles, notebooks and pens, candy, etc... I am even going to make some as centerpieces for a baby shower I am hosting in a couple months. Another great idea is a silverware and napkin holder!! The possibilities are endless and you can create it for any theme you would like!
Here is the one I am using for a baby gift:


The stroller and bottle were cut from the Cricut American Alphabet cartridge that came in the Cricut Expression 2 Anniversary Edition. The Onesie is from the "Wrap it Up" cartridge and the Rattle is on "New Arrival". I cut all of them at 3 inches.
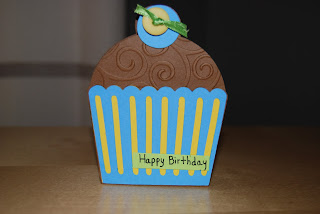
Here is the Birthday gift holder and a couple of the things I included in it!


The Cupcake Birthday card was cut from the "Sweet Treats" Cartrigde. The topper for the Skittle Stick is from Cricut American Alphabet and I made the little desktop note holder from a plastic 4x6 picture from I picked up at Walmart! I am going to put a couple other little things in there but I just love the presentation of the gift holder! So much fun!!
Have a great day!!
Rebekah

Wednesday, August 24, 2011

Pirate Themed Birthday Card

Hi Everyone!
My nephew is turning two in a couple weeks and it having a pirate themed birthday party. My husband bought me a gypsy a while back when they went on clearance for $50!! I was suprised to find that there were few cartridges already loaded on it. Everyday Paper Dolls was one of them and that is where I got all the cuts to make this card! I love how it turned out!!
Have a great day!!
Rebekah

Tuesday, August 16, 2011

Disney Ultrasound Album

Hi Everyone!
Today I have a fun project to share with you! One of my sweet friends just found out she is having a baby boy in January. I offered to make her an album to keep her ultrasound photos in and she requested "Mickey Mouse" as the theme.
I found the actual chipboard album at JoAnn's and thought the paper that came with it was perfect for a Disney theme.
All of the characters are cut at 4 inches and are from the Mickey and Friends Cartridge. The letters are from the "Cuttin Up" cartridge.
I think it turned out adorable and she LOVED it!! I might have to make another one for me ;-)
Rebekah


Wednesday, August 10, 2011

A Special Day!!

Hi Everyone!
I am so honored and excited to be a guest designer today for Sarah at www.pinkcricut.com ! She is so talented and has created an amazing collection of stamps for all occasions.
For those of you visiting for the first time, welcome!! For those returning visitors, you may be wondering why I haven't posted in awhile. My husband is a school teacher and had the summer off so I decided to take a break from crafting and spend time with my family. I love crafting but I love my family more and want to take advantage of this precious time that goes by so fast!
There have been a couple special occasions I needed cards for this summer and I have posted them below. Enjoy!!!
Rebekah


A very Special Day!

Monday, May 16, 2011

Mother's Day Cards and Gifts

Hi Everyone!

I know I am a little behind in posting Mother's Day projects but better late than never! :-) At our church on Mother's Day, we honor all the mothers and then a few other "special" moms such as "Mom with newest baby", etc.. I was asked to make these special cards and really enjoyed making them.


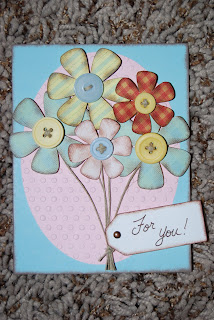
Last but not least, I wanted to share with you some paper flowers I made for Mother's Day. I got the idea from Joy over at Joyslife from the flowers she received from Provocraft


I really like how they turned out! I will have to try different colors and do some for other occasions!!


Hope you have a wonderful day!


Rebekah