Pages

Create ~ Inspire ~ Share

Thursday, October 11, 2012

Melisa's Crafty Creations Blog Hop


Hi Everyone,
I am honored to be part of this fun blog hop today to celebrate Melisa's one year blogiversary! ( Not sure that is a word, but it works!) :-)  I am your last stop on this halloween/fall themed hop! Remember to leave a comment on each blog in order to have a chance to win some prizes.

Here is the order for the hop:


I have had a $1 frame from Michael's laying around forever, so I decided to spruce it up for Halloween.  I modge podges some paper from the Trick or Treat Stack from The Paper Studio, found all my cuts in the silhouette store and had these cute little faces from Peachy Keen Stamps!  The "Boo To You" sentiment is from one of the first sets ever released by Pink by Design.  I strung the banner together with some PBD twine and added a couple decorative brads from Hobby Lobby.


I added this to my Halloween decor and will update it each year with a current picture :-)

Thanks for hopping with us today!

~Rebekah

Wednesday, October 3, 2012

Master Crafter Project

Good Morning!
Today is the day!  It is time to link up my Master Crafter project for Pink by Design :-)  What is Master Crafter??  Sarah Hamer from Pink by Design was able to get a few sponsors and gave 100 people a box of crafting items.  Our goal was to make a project using the stuff in the box and other items we had on hand.  Today is the day we link up our projects so that the voting can begin.

Here is what was in our box:

- Scissor Mouse sponsored by Westcott 
-DCWV Rockstar mat stack sponsored by DCWV Deals
-Cotton Bag Sponsored by State line Bag Co. 
-1/2 sheet of Rhinestones sponsored by Queen & Co.
-Sentiment stamp sponsored by Pink by Design
- a button 
I wanted to make something that I had never done before and force myself to think outside the box.  This is what I came up with...

What is it,  you ask???
It's a Candle Cozy :-) I put pumpkin spice scented bath salts in the bag and decorated it with a matching tag!  I thought it would be a fun way to decorate my candles year round without adhering it to the candle.  When Halloween is over, I take it off and add a new one!  I use a battery powered candle just to be safe!  This is also a great gift idea!
Here are a bunch of pictures so you can see the entire thing...


How did I make it?
I cut some felt that I had in my stash and sewed paper from the DCWV Rockstar stack.  I also used other paper from this stack for a few of the pumpkins and the stems.  I used two sentiment stamps from PBD and the faces are from Peachy Keen Stamps.  The green rhinestones went perfectly with the stems.  All of the cuts are from the Silhouette store.  The button that came along with my box was perfect to help hold the Candle Cozy together.  A simple hair tie was used to connect it.
I thought this was a fun, outside of the box idea.  This is only the third time I have ever sewn anything and was happy with how it turned out :-)
If you think my project deserves to win, please come over and vote for me HERE!!
~Rebekah

Tuesday, September 25, 2012

Getting Ready for Fall

Hi Everyone,
I have been wanting to put a wreath up on my front door FOREVER, but I just couldn't figure out what I wanted.  I wanted something that could stay up year round but could easily be changed for the different times of year/holidays.  This wreath has been in my closet for almost a year so I decided today was the day.  Hobby Lobby has their wood letters on sale for 30% off (cost me less than three dollars) and their ribbon for 50% off.  I thought it would be cute to keep the letter the plain wood color and just change the bow throughout the year.  My silhouette came in handy for cutting the "Est. 2002" on brown vinyl and the font is playball.  There are super strong magnets holding the ribbon on the backside of the door which works perfectly!


Here is an up close view


I love how this turned out and how simple it will be to change it up.

~Rebekah

Monday, September 24, 2012

Mickey Mouse Travel Journal

Happy Monday!
Awhile back, a friend of mine asked me if I could make her a trip journal for their upcoming trip to Disneyland.  She has an adorable 8 month old and wanted to put the highlights from his first trip all in one place.  I decided to try out a digital kit for some of the papers and  embellishments because I didn't want it to be too bulky.  I found the kit here!

I used my Silhouette to create this entire book.  The fonts are from my computer, a few images are from my cuttlebug folder, and the rest is done using the digital kit.  I laminated the front and back cover to give it more stability because she is taking it with them on their trip.  I then used my "bind it all" to hold it all together.  This book is 5"x7" (Perfect for traveling).  I created the journal pages on my silhouette by making my own lines and then fitting the digital images around them.


On this page I used my cuttlebug and die cuts I found at Big Lots a few years ago.


The page on the left is also done with my Cuttlebug die cut folder


What a fun idea to keep your memories from "The Happiest Place on Earth"!

Have a great day!

~Rebekah
Tuesday, September 18, 2012

"Super" Birthday Card

Hi Everyone,
Today is my day to post over at Pink by Design!  Here is my project.  If you want all the details for this adorable little guy, you are going to have to head on over and check it out ;-)


Isn't he cute?!

Have a great day!

~Rebekah

Monday, September 17, 2012

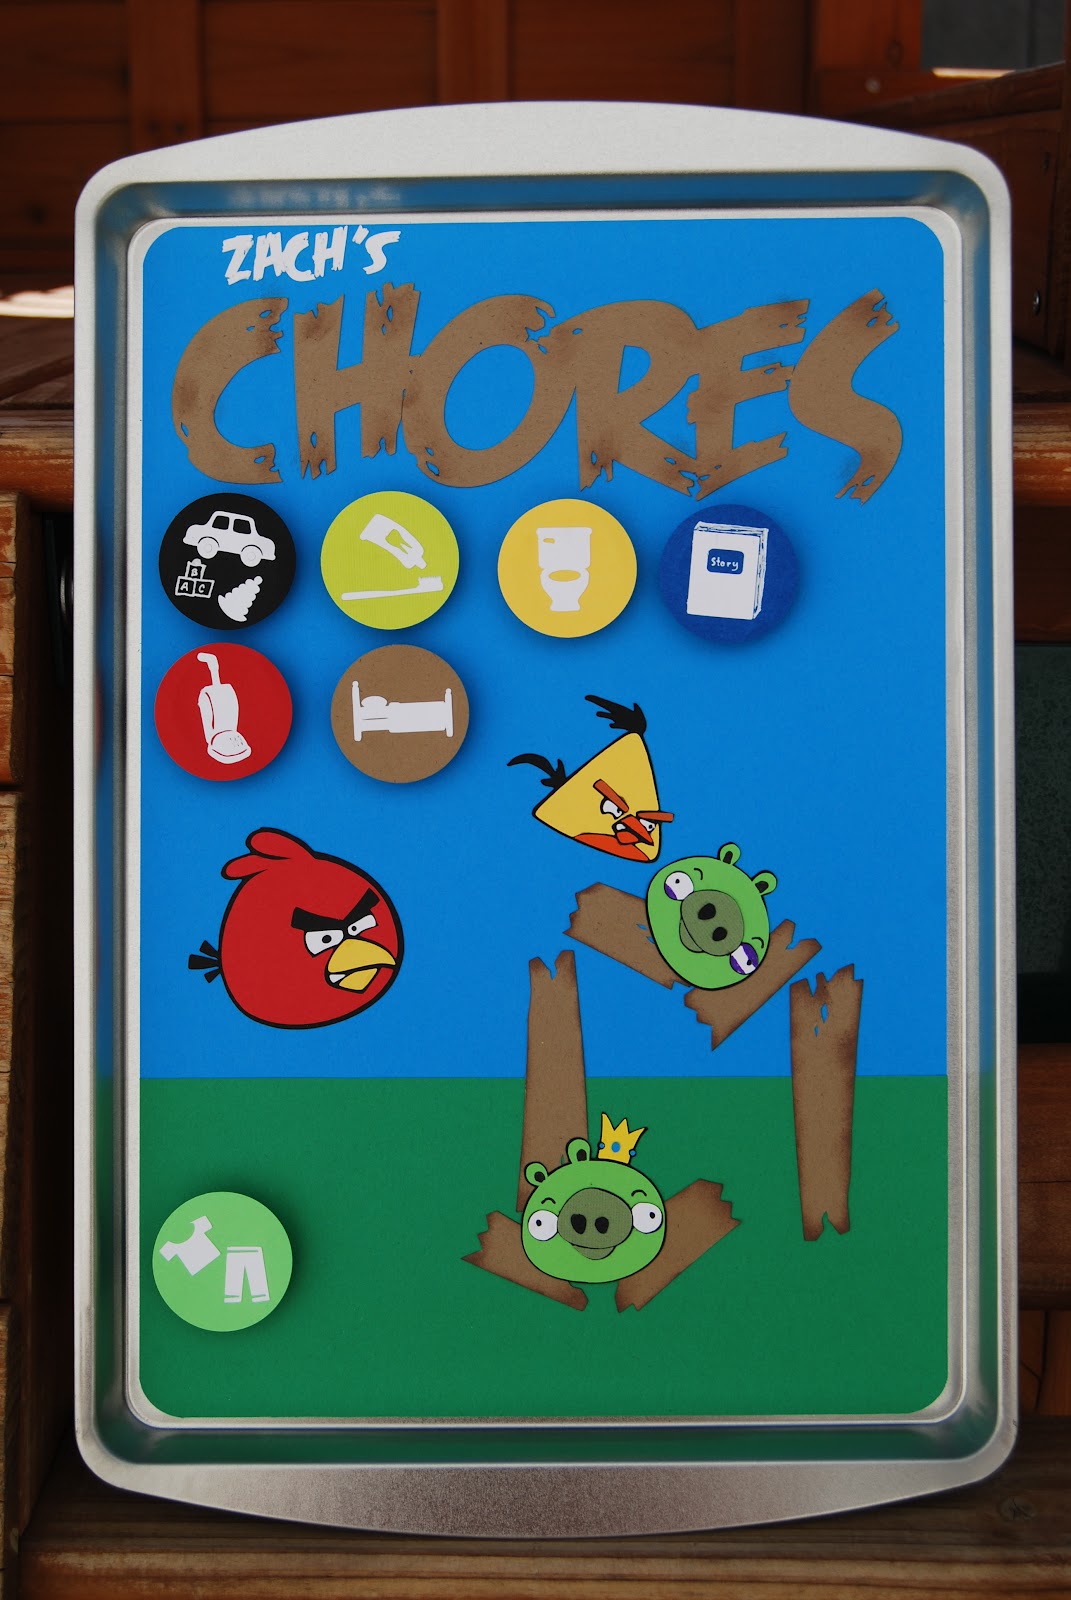
DIY Angry Birds Chore Chart

Happy Monday!
Today I have a fun Dollar Store project for you.  My boys are 3 and 4 years old and have really started to enjoy helping me around the house.  I thought they might enjoy their own chore chart with their new craze, Angry Birds!!

What you'll need:
Cookie Sheet ($1 at the dollar store)
Magnets (Set of 8 at the dollar store)
Hot glue gun
ATG gun or some other adhesive
I used my silhouette for the angry birds, chores, wood, and words
different color cardstock
The font I used is called "Feast of Flesh" and you can get it for free from dafont.com!


They absolutely love them!!


It's my turn to post tomorrow over at Pink by Design and you don't want to miss it!!  Here's a hint: It's a super hero project ;-)

~Rebekah

Thursday, August 30, 2012

DIY T-shirt Sailor Knot Headband Tutorial

Hi Everyone,
Today is a big day!  I am doing a step by step picture tutorial for you :-)  I have been seeing these super cute t-shirt headbands on Pinterest but there weren't really any tutorials to make one from a t-shirt.  I decided to play around with some old stained jersey cotton shirts of mine and figured it out!! There is no sewing involved!!!


Here is what you need:

An old cotton t-shirt
scissors

That't it!!!


First, you are going to lay your t-shirt out flat


2. Cut the bottom hem off


3.  Now, you are going to cut as many 1/2 inch strips as you want.  The more strips, the thicker the knot will be and will stand out better.  Make sure you cut in even numbers.  For this tutorial I only cut two so I could show you a little easier.  The final picture is actually six strips!


4.  Now, pull the strips tight.  This will make them roll up.


 5.  You are ready to make the sailor knot!  Take one strip and cross it right over left


6.  Take the other strip and lay it right on top in the shape of a U


 7.  Take the right side of the U and put it under the right end of the loop


 8.  Take the left side of the U and place it under the loop


9.  Now, take the right side of the U and put it under the left side of the U and pull it over the top of the loop (it is really hard to explain in words but super easy)


10.  Now you should have two end sticking out the top and two at the bottom.  Pull the top end and the bottom ends away from each other and the knot will form.  You can make it as loose or tight as you want! (Remember that this is a much smaller knot because I only used two strands.


11.  Make sure you stretch out the strands so they are the same length.  Cut a small strand from the sleeve of your t-shirt (about 4 inches long).  Bring the 4 loops together


12.  Now,  you are just going to tie, the small strip around the loops to connect them into a circle.  Make sure you double knot and pull tight!  This pic is before I tied it.


Here is what it looks like tied


Now you just put it on like a normal circular headband.  This next picture is what it looks like with 6 strands!!


Isn't it cute!!

I made a bunch in different colors today.  I am going to use the two strand ones when I go to the gym and save the bigger ones to wear out and about!  The color possibilities are limitless and it's a great way to recycle and old shirt that is just going to get thrown away anyway :-)

Thanks for stopping by today!

~Rebekah